Sorting Your Fleece
There are two types of fleece. The ‘perfect’ ones and the ‘real life’ ones. The perfect ones are out there but they are very rare. They would be from a breeder and a breed that you know, from a sheep that was probably kept for showing and wears a coat for most of the year and so is very clean; was shorn by an expert and rolled and stored to perfection. Then there are the fleeces that most of us come across. The ones that come from a friend of a friend who knows a person down the road who has a couple of fleeces going spare. Sometimes you will be lucky enough to know what breed it is but it’s unlikely that you’ll know what conditions the sheep were kept in let alone the state of the fleece!
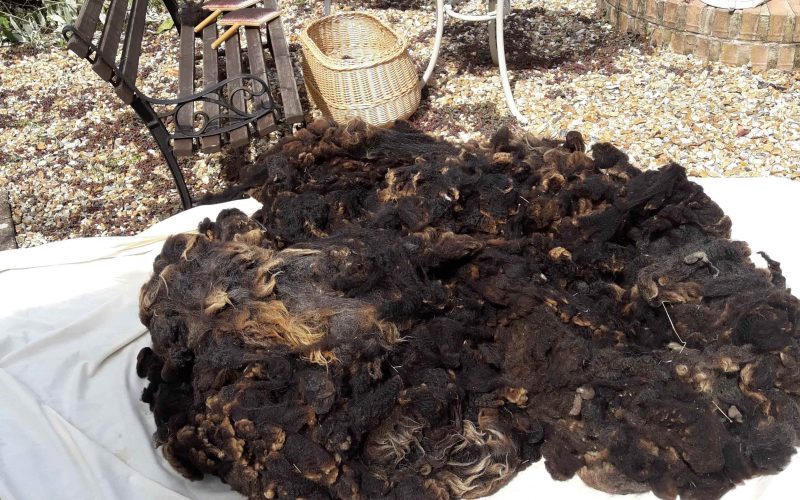
Once you have acquired your fleece the first thing to do is to get it out of the bag and lay it out. Cut side down. Laying it on an old sheet works well. Wear gloves if you are the slightest bit squeamish, have allergies or open cuts on your hands. If you have a large enough table (outside) that would be perfect but the floor usually has to do and your back will suffer for it. You will need to ‘skirt’ your fleece. A process of removing all the unusable bits of the fleece. If you are lucky this may have been done by the shepherd before your fleece gets to you but again this is not always the case.
Within one fleece, you will find different grades or quality of wool, which are used for different purposes. The diagram below shows the different parts of your fleece. Once you are familiar with what you are looking at, begin sorting through carefully removing all of the undesirable wool. My rule of ‘thumb’ is DON’T BE TOO PRECIOUS ABOUT YOUR FLEECE! It will seem like you’re throwing a lot away (and you could be) but you need to keep the best bits and you will have plenty of them. You can expect to lose around 20-30% of the raw weight after skirting and washing. Don’t waste your time trying to save every little bit because your end results will suffer and you will get disheartened. Take things one step at a time. The really dirty bits can be composted or used as a mulch around plants: some I keep for stuffing or felting and some for some chunky spinning and making into rugs or mats.
Hopefully your fleece will all be in one piece. If it’s not then you can only do your best and use your best judgement on what to keep. Some of it will be very obvious, very mucky or full of vegetable matter. Don’t be tempted to keep this!

Pick a starting point, such as the tail, and work all the way around the fleece removing about 2 to 4 inches of wool all the way around – exactly how much depends entirely on the cleanliness and quality of the fleece.
- Remove the belly and leg wool first then remove all breech wool in the leg area. The breech wool is more coarse than the rest of the fleece and can be used for rug wool. The more fleeces you process the easier it will get to recognise this.
- Remove all clumps of manure (mostly in the stain and dags area but can occur elsewhere) and vegetable matter like hay, shavings, sticks, beetles and the like. If there are any very stained areas (coloured marker) take these away too.
- Shake the fleece to let any short /‘second’ cuts of wool fall to the ground. These are where the shearer hasn’t quite gone close enough to the skin and has a second go or is making the cut look ‘tidy’ producing very short fibres. These will make your wool lumpy when you spin. If you don’t mind lumpy wool then you can miss this step but you will regret it later. You won’t manage to get them all but the more you can remove the better. You can keep them and use them for felting.
- Next, take away the front leg wool and the head wool. Then work down the other side the same way, back to the tail. If there are any areas that are felted or matted and don’t pull apart easily, these should be removed too.
There are a couple of other tests you can do on the fleece to check for ‘tipping’ and breaks. Personally I don’t do these as normally you would do this test before buying a fleece.
Tippiness is caused mainly by weathering and is most likely to occur along the spine. Pull a small lock no thicker than a pencil and hold it by the cut end. Grasp the tip between the nails of your thumb and index fingers and give it a little tug. If the tip breaks off then the fleece is tippy. Skirt the tippy area away – the tips will break off when the fleece is carded and form ‘neps’ again making your wool lumpy.
Wool breaks are also easy to detect. Look at a lock of the fleece – is there an area in the length that looks thinner? Again, give it a tug. Does it come apart? To confirm that there is a break, take a thin lock, maybe half the diameter of a pencil, grasp it in both hands, hold it up to your ear and pull. Do you hear a crackling or ripping sound? If so, that’s a wool break. This would not be a good, sound fleece.
So, now you are ready for washing! This will be covered in a separate article. Your pile of waste wool can be used for mulch around your tender garden plants. I put mine on the compost. If you have a pile that’s not good enough to spin but too good to throw away, you can wash it separately and use it for felting or rug making.
There are many videos on Youtube on how to skirt and wash fleece. There is no ONE way do things so watch many, and choose a method that suits you.
NOW WASH YOUR HANDS!
If you can’t wash your fleece straight away and need to store it, ideally, place it in an old pillow case or sack, preferably not plastic and store in a cool place. I have used plastic vacuum bags (yes, plastic but if stored away from heat so they don’t sweat they will be ok) which work quite well. If stored for any length of time be sure to check for moth infestations as these will ruin your fleece.